

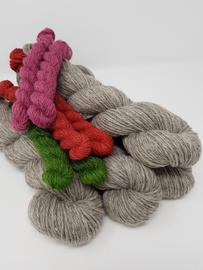
Our yarn kits contain the required amount of yarn needed to complete the project in a particular size.
Recently added


The Vintage Fit: Expert tips for knitting a well-fitting garment

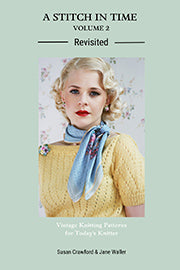
This article was originally published in my book, A Stitch In Time Vol. 2, which is available to buy as an instant PDF digital download here. This book features vintage knitting patterns from the 1930s-1950s, updated and expertly graded to fit sizes up to 150cm (60 in) chest.
How Knitwear Fit Changed Through The Decades
To enable us to understand how to create a garment with the perfect vintage fit we need to know what the fit is that we wish to achieve:

1930s
The basic shape of a sweater changed dramatically from the long line tubular shapes seen in the 1920s, with sweaters ending at the waist, usually emphasised with a deep, ribbed waist band.
Shaping was minimal and often worked on a single row immediately above the waist band. Additional shaping was introduced at the armhole, narrowing the shoulder line, with the armhole seam sitting on the shoulder ball itself. The lack of shaping and deep waistband also created a slightly blousoned effect around the wearer’s middle.
Necklines were often draped or ‘softened’ in one of a number of inventive ways, discreetly creating additional bust room and drawing the eye to the décolletage and away from the chest. In addition to this, the front of the garment would sometimes have a greater number of stitches than the back up to the underarm, when increased shaping would be worked over the same number of rows as the back, ingeniously ‘scooping’ out the excess fabric found at the front seam area between the arm and the breast.
Sleeves, if short, were usually full, and if long were often very long with detail at the cuff, drawing the eye downwards and creating an illusion of length. Belts were often shown worn over the ribbing to emphasise the waist even more.
Garments were mainly knitted in fine yarns – from laceweight to fingering weight wools – but surprisingly, thicker yarns also made an impact during this time reflecting the amazing creativity and commercial growth in the yarn industry at this time.
Underwear was soft and relatively unformed with the bustline much lower than is the norm today.

1940s
In some ways there are a lot of similarities in the jumper shapes of the 1930s and 1940s. However, after the deep rib band, shaping was often increased more gradually at regular intervals up to the armhole. (Garment length had grown a couple of inches by this point usually – with 28cm (11in) to the armhole now extending to 33cm (13in).
Armhole depth deepened slightly at this time too, now offering 16½ to 18cm (6½ to 7in) depth on an 81cm (32in) bust garment. (In the 1930s this could be as little as 14cm (5½in)). This extra depth allowed for increased shaping to be worked at the armhole, narrowing the shoulder line further and for the armhole seam to sit high on the arm socket joint.
Necklines were often cut high and square to emphasise this straight line across the shoulders. This was exaggerated even further with the puffed, gathered and box head sleeves sitting high on the ball and socket joint, helped along by knitted shoulder or sleeve pads.
Sleeve length extended to just above the elbow but with less fullness than in the 1930s.
Cardigans were cut in a similar way but with deep V necks, sometimes starting just above the welt itself. This shaping significantly reduced the number of buttons needed.
Negative ease became extremely popular and was used extensively in the 1940s to create garments with incredible stretch.
Patterns were written for fine yarns on the whole with designs for every aspect of clothing offered, including underwear and dresses. With a shortage of yarns throughout most of the 1940s, fair Isle patterns became increasingly popular allowing oddments of yarns to be used.

1950s
The line of sweaters altered more significantly in the 1950s, with an increasing availability of yarns allowing garments to be worn to the hip, teamed with rounder, softer shoulders and deeper armholes, providing a ‘batwing’ effect.
The longer body length meant that waist shaping could be incorporated into designs creating an hour glass shape and drawing attention to the hips for the first time. Sleeves were sometimes worked in one piece along with the body, streamlining the overall look. Suddenly cardigans had 9, 10 even 11 buttons as though celebrating the availability of a previously restricted commodity.
Necklines were either cut low into scoops – V’s, squares, and Sweetheart necklines being particularly popular – or were cut very high around the neck.
Negative ease was again used around the bust to create the Sweater Girl effect. To accompany this longer line sweater came boleros, worn high above the waist and generally curved at the front.
This shift to longer line garments, meant that looser, long straight sweaters and cardigans also began to appear, softening the silhouette still further.
A much wider variety of yarns, such as angora, became available in the 1950s and alongside very fine yarns, thicker yarns became more and more popular, with Sports, DK and Worsted (aran) weights, appearing more and more in 1950s patterns.
By far the most popular look of 1950s knitwear was undoubtedly the twin set, with neat high neck jumpers worn underneath matching round or V-neck cardigans.
A change in the type of bra being worn, emphasised and lifted the bust-line much more than in the last two decades. This coupled with waist hugging girdles altered the female form under the jumper dramatically.

Perfecting the Vintage Fit In Knitted Garments
Now we can see how the garments from each period are supposed to fit us, how do we make sure that they do?
In A Stitch In Time Vol. 2, comprehensive sizing charts have been produced to enable you to compare your own measurements to that of the pattern so that you can make adjustments if necessary.
On most garments, but most significantly on vintage garments, the placement of the shoulder seam is of paramount importance. Cross back also known as shoulder to shoulder measurements, have been given whenever possible on the sizing charts to assist you in the fit process.
To make the appropriate comparisons you will first need to measure yourself. Its not easy to do this by yourself so enlist the help of a friend. Try and use a reasonably new tape measure too as over time they stretch and are not always accurate.

It is best to record measurements in both inches and centimetres as patterns can require either. It is also best to date your chart so you don’t keep using a chart from a short while ago that turns out to be five years old! Also do bear in mind that there may be times when additional measurements may also be needed, such as round arm immediately above the elbow, but these are very specific so I have not included them here.
So now we have to compare our own measurements to that of the chosen pattern so that we can see where the little tweaks may need to be made. To do this easily I suggest drawing a simple schematic. Write in the dimensions of the garment based on the given pattern in one colour pen, and then write your own required dimensions around it in a different coloured pen and from there start to make notes on adjusting the pattern.
So, what changes may you need to make and how do you make them? Below I have listed a number of common problems and how to deal with them.

How to adjust a pattern if my shoulders are narrower than the finished pattern
Increase the number of decreases worked at the armhole to remove the extra shoulder stitches. Ensure the adjustment is balanced on all four shoulder cast offs.
You need the extra width at the front but it will make the back gape
(1) Knit the back to the size you require, then knit the front to the larger size needed, but at the armhole work extra decreases to remove the extra stitches so that the shoulders match. Also a great way to prevent gaping on cardigan fronts.
(2) Work front and back in smaller of sizes needed but shortly below your bust line, change to a slightly larger needle on the front only and use until armhole decreases completed. Change back to smaller needles.
(3) If a lower neckline with a straight front edge, work front in larger size as required, then alter the front neckline rather than the shoulder to include the extra stitches. K2tog before each cast off stitch on centre front to create a softly gathered neckline.
(4) The stretch in many 1940s garments is great for larger busts, just remember to add extra length to accommodate the added horizontal stretch. Lower cut 1950s garments are also fabulous for showing off what nature gave us! To wear the 30s styles add a bit of length below the armhole to provide some extra fabric for blousing. Combine this with method 2 if a lot more fabric is needed at the front.

You may need the extra bust room but you have a narrow waist
(1) Cast on the required size for your back for both front and back pieces but on front increase the number of increases worked either on single increase row or if incremental increases work more until front has required number of stitches, for the size needed. Work extra decreases at armholes on front only, until shoulder sts match.
(2) Work front and back in smaller of sizes needed but shortly below your bust line change to a slightly larger needle on the front only and use until armhole decreases completed. Change back to smaller needles.
(3)If a longer line garment, work as required in pattern until waist area, now change to smaller needles and work approx 9cm (3in) in tighter gauge, then change back to larger needles.
Small all over but with proportionally bigger cup size
Negative ease of 1940s garments is fabulous for you. Work to the size you need for the back and just let the garment do the rest of the work. Alternatively use techniques (1) or (2) from the previous section.

Broad back but flatter chest
(1) Work back to larger size and front to smaller but work fewer decreases at armhole on front so that shoulders match.
(2) If lower neckline with straight edge front, work both front and back to larger size. Work armholes as specified but k2tog along centre front as casting off to close front up. Using gathers in this way on a smaller chest gives the illusion of more shape.

Longer body
Work extra length between the ribbing if there is one and the armhole shaping. If there are increases to be worked extra rows should be divided evenly between the increases. Avoid altering the length of the armhole if at all possible.
Sloping Shoulders
1940s shoulder shaping with small knitted sleeve pads work great for creating a straight shoulder line. 1930s styles positively celebrate slim, sloping shoulders so no problems there!

Leave a comment
Comments will be approved before showing up.